Getting going with modern Common Lisp on Windows
The high-level outline for this is:
-
Download and install CLISP (http://clisp.cons.org/)
-
Download and install Emacs (http://www.gnu.org/software/emacs/)
-
Download and install Quicklisp (http://www.quicklisp.org/)
-
Configure everything so that it plays nice together.
Download and install CLISP
Download CLISP from Sourceforge here: http://sourceforge.net/projects/clisp/files/clisp/2.48/.
Note: the latest version (at the time of writing) is 2.49, but it reportedly has problems with Windows paths and I’m having trouble getting it to load SLIME properly, so for now I’m recommending 2.48.
You want clisp-2.48-win32-mingw-big.exe. (The “big” download is only 1.1 MiB
larger and includes a larger pre-built library). Run the installer, and feel
free to choose the defaults. CLISP will end up being installed at C:\Program
Files\clisp-2.48, and it will add that directory to your PATH (which is
important later).
Unfortunately, there’s a bug in the 2.48 installer. You’ll need to copy a file
into the right place to launch 2.48 successfully. Open up Explorer and browse
to C:\Program Files\clisp-2.48 (or wherever you installed it.)
In the clisp-2.48 directory there’ll be another directory named libsvm; copy
svm.dll out of that directory and place it in clisp-2.48\full.
Once that’s done there’s a CLISP link in your Start Menu; you should be able to run it and see the following:
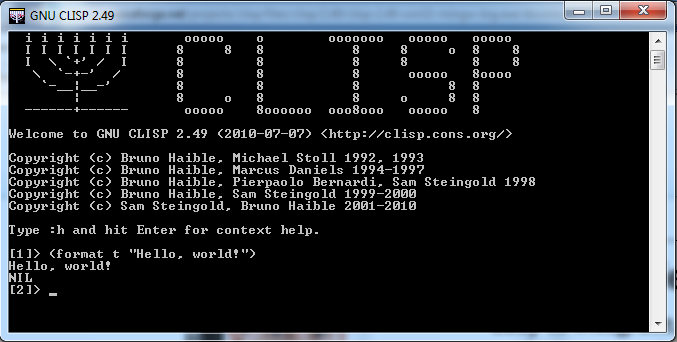
To quit just hit Control-D or type in (quit) and hit enter.
Download and install Emacs
Pre-built binaries for the latest Emacs are available at http://ntemacs.sourceforge.net/. You can download the latest CVS binary, or you can go back to the last stable release. The latest CVS is probably fine though.
Unforunately they’re only offering .7z files at the moment, so you’ll probably need to grab 7zip (http://www.7zip.org/) as well if you don’t have it already.
Extract the ntemacs file wherever you’d like it installed (C:\Program Files
works fine). In ntemacs24/bin you’ll see a file named runemacs.exe; make a
shortcut to that someplace handy (Desktop, Start Menu, etc.). Go ahead and run
it to make sure it loads; you’ll need it in a moment.
Download and install Quicklisp
Download Quicklisp from http://www.quicklisp.org/. (It’s in beta at the time this was written, but it’s fully functional and awesome). Download the install file (http://beta.quicklisp.org/quicklisp.lisp at the time of writing) and save it to disk somewhere easy to find.
Next, run CLISP and type in the following:
(load "C:/path/to/quicklisp.lisp")Notice that you’ll need to use forward slashes instead of Windows normal
backslashes. (Or if you want you can use \\).
After it loads, run:
(quicklisp-quickstart:install :path "C:\\quicklisp\\")Note: By default Quicklisp tries to install in $HOME/quicklisp. It tries to
figure out where that is by running (user-homedir-pathname), which as far as I
can tell relies on $HOME being set properly. Unfortunately, Windows (version 7
at least) sets up $HOME differently depending on how you ran the program. If
you run CLISP on the command line, $HOME won’t be set at all so it’ll use
$USERPROFILE instead. If you run it from Emacs (as we will be later), $HOME
will be set and you’ll get a different directory ($APPDATA). All in all,
it’s arg-inspiring.
Long story short, we’re installing it in a known location. (C:\quicklisp).
That’s why we’re passing a path above. The trailing \ is important; don’t
leave that off.
That’ll download the rest of the system and get it set up for you.
Now go ahead and read on http://www.quicklisp.org/ about how to use it. It’s very easy to search for and install Common Lisp libraries. For example, to get ahold of “ieee-floats” for the previous entry, just run:
(ql:quickload "ieee-floats")That will download the library if it hasn’t already and load it into your CL environment for you.
Configure everything so that it plays nice together
First, CLISP is going to need some configuration to find temporary directories properly. Not sure why, but SLIME (the IDE we’ll be setting up in Emacs) will barf complainining about the temporary directory if we don’t do this.
Open up $HOME\.clisprc.lisp (e.g.
C:\Users\username\AppData\Roaming\.clisprc.lisp. Ain’t Windows grand?) in a
text editor. (Emacs, for example:)). Add the following:
;;; Load Quicklisp when CLISP launches
#-quicklisp
(let ((quicklisp-init "C:\\quicklisp\\setup.lisp"))
  (when (probe-file quicklisp-init)
    (load quicklisp-init)))

;;; Fix for CLISP on Windows.
(setf temporary-file-directory "C:\\<home-directory>\\AppData\\Local\\Temp")
(setf (ext:getenv "temp") temporary-file-directory)
(setf (ext:getenv "tmp") temporary-file-directory)
Replacing <home-directory> with your home directory. (e.g. C:/Users/whomever).
This should work for Windows Vista and 7, on Windows XP use C:\<home-directory>\AppData\Temp. Go ahead and save that file; you should be done
with it now.
Next, run CLISP again and enter the following:
(ql:quickload "quicklisp-slime-helper")This’ll install SLIME (http://common-lisp.net/project/slime/) for you, an awesome Common Lisp development environment.
Last, open up your Emacs configuration file. The easiest way to find this is
to just launch Emacs and type in Ctrl-x, Ctrl-f and enter ~/.emacs in the
prompt at the bottom of the window.
In that file, add the following lines:
(setq inferior-lisp-program "clisp.exe")
(load "C:\\quicklisp\\slime-helper.el")
At this point, you should be ready to go. To try it all out, launch Emacs, type Alt-x (Meta-x, technically), and type in “slime”. Hit enter and you should find yourself at a CL-USER prompt within Emacs.
Now, actually learning to use SLIME is well beyond the scope of this entry. For that, I recommend Peter Seibel’s Practical Common Lisp. Chapter 2 covers getting around both in Emacs and SLIME. (It talks about Lisp in a Box, which is sadly unmaintained at this point, hence this blog post).
Really, if you’re at all interested in learning Common Lisp then PCL is an excellent resource, and I suggest you buy a copy. I’ve just about worn mine out. :)